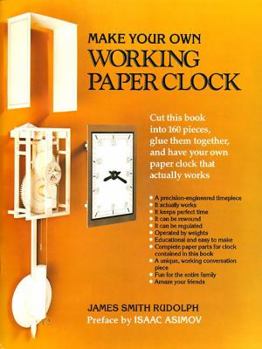
Make Your Own Working Paper Clock
Select Format
Select Condition 
Book Overview
Clocksby Isaac AsimovThrough most of history, people hardly felt the need of clocks. It seemed sufficient to consult one's own physiology to tell when one was hungry or sleepy, or to observe the general position of the sun in the sky during the day or that of the Big Dipper at night.Those who were meticulous enough to want something better searched for some regular motion that existed in nature or that could be contrived. In ancient times, the sundial...
Format:Paperback
Language:English
ISBN:0060910666
ISBN13:9780060910662
Release Date:August 2001
Publisher:William Morrow & Company
Length:40 Pages
Weight:0.85 lbs.
Dimensions:0.4" x 9.5" x 12.5"
Related Subjects
Crafts Crafts & Hobbies Crafts & Hobbies Games Papercrafts Papercrafts, Stamping & StencilingCustomer Reviews
5 ratings
A clock that run couple hours
Published by Thriftbooks.com User , 19 years ago
After 3 weeks of late night work, I finally finished it yesterday. At the beginning the pendulum only swung 5 to 6 times and then stopped. After tuning the position of wheels 3 times, now my clock can keep ticking for couple hours. It is very cool! However, it is very difficult to set time in this clock. But that's okay to me, coz I don't expect it to show correct time anyway. Some suggestions: - as all other reviewers said, all the cutting must be very precise. - Get yourself a pair of "normally closed" tweezers and of course a pair of regular tweezers as well. It helped me a lot when gluing pieces together. - I used knitting needles instead of wire for axles. I used 2.25mm (US #1) for axles for motor wheel and minute hand, and 1.5mm or 1.75mm (US #000 and #00) for other axles - I cut a big rectangular hole on the face, and removed the case, so that people can see the cool wheels inside - I have to tilt the whole clock to the right a bit, or else the pendulum will stop swinging after a few seconds - I added two quarters to the end of pendulum rod, which seems to help a little bit - Make sure you get your wife's approval on making this clock, because for sure you will be spending many nights on this project
Typo on p. 35
Published by Thriftbooks.com User , 21 years ago
I have an older copy of the book, and the recently purchased copieshave the following typo. On p. 35 there are two + symbols defined instep E. The first is the one which ought to have dots accompanyingit, to indicate that bearnings are needed at that point. (You can seethis symbol on the pieces of the clock, such as part #49, #50 etc.)Donna Dietz
A very good book!
Published by Thriftbooks.com User , 24 years ago
This project requires considerable time and patience but you *can* end up with a clock that really works. As previously mentioned I think the best strategy to to work about an hour or so each evening, it took me too months to complete the clock with extra hours on weekends. It works! The key is the gears. The main issue is the concentricity of the gear wheels -- in other words, their outer edge rotates a constant distance from the center. Get this wrong and the wheels will bind as they rotate against one another. Two problems: finding the center, and constructing the gear wheels consistently. The first gear you meet is the main drive wheel, it took me a week to construct. Put an axl in it and spin it to make sure it's concentric as you build. Make sure the inner mesh gears of the secondary gear (and others) are consistent (no teeth wider or narrower than others, trim them with a exacto knife if needed. Tip: they should be bent into an straight accordian shape before glue, this way you can see that all teetch are even. The main gear and secondary innner gear are most important -- up to the escapement. The later hand gears are no problem. Once complete you need to patch, trim, reposition axles, cut... Note that on the book cover the squished main gear teeth that the author adjusted to make the wheel concentric!
Patience, patience, patience...
Published by Thriftbooks.com User , 25 years ago
I got one of these books as a gift in 1985 (I was 14) and built it over Christmas break. It was very time consuming, and patience and precision were key. It ran quite well at first, but after about a week, the paper started to wear enough that the friction caused it not to keep time anymore. Eventually, it started binding and quit running altoghether.It's almost 15 years later now, and I found it in a box. Wow! It doesnt run anymore of course, but it's still a great conversation piece. I think I just may get another one of these and give it another go round...
A lot of fun for patient people
Published by Thriftbooks.com User , 26 years ago
I'm building this clock now, and having a ball. Nonetheless, I'm here ordering a second copy because I messed up a key part--you have to be extraordinarily precise in assembling this clock. I have a few bits of advice:- Save yourself some shipping costs and order two of these now.- Use Aileen's Tacky Glue as your adhesive.- Use as little glue as possible (very little).- Have lots of clamps and weights on hand. I am using spring clothespins and lots of coins. I think surgical hemostats would help a lot, if I had any.- Be liberal with X-Acto blades. I may well use 50 on this project.- Spend no more than an hour a day on this. Personally, if I spend more than that, I get impatient and make mistakes.


